Showing posts with label DIY. Show all posts

Friday, June 21, 2013

Kitchen Beautician: Bye, Bye Blackheads

Image: Google
It’s time to pamper ourselves once again! Do you have large pores or blackheads and you want to get rid of them? Well this mask/peel will do wonders! If you have used the Biore pore strips, you know that feeling of taking the strip off and seeing all your pores and blackheads gone. And on that strip is a “forest” of your blackheads. Well this mask is exactly what those strips will do but for your whole face.

You will need:
1 egg white
Toilet paper or tissue
Cotton ball

Instructions:

Begin with a cleansed face. Separate an egg and keep the egg white in a bowl. Whisk it a bit and leave it aside for a few minutes. Now you can get your toilet paper or tissue (you can experiment with a napkin or paper towel as well to see which works the best for you) and separate the layers.

Now let’s begin applying the mask. Using your cotton ball, dip it into the egg white and apply it onto your entire face. Let it dry partially before applying another layer. You are going to apply 4 layers of the egg white on your face. Allow the fourth layer to partially dry, then apply a fifth layer of the egg white. This time do not let it dry and begin applying the thin toilet paper or tissue over your face. Leave room for your eyes, mouth, and nostrils. Apply another layer of egg white over your toilet paper or tissue being careful not to rip or ruin the paper. You can apply another layer of tissue and then reapply the egg white again. *You may look funny, I could not stop laughing at myself, but it was all worth looking like that*

Allow you mask to dry completely. You can let your mask air dry or fan dry; it is entirely up to you. You will feel your skin tightening. After your mask is completely dry, peel it off. It may hurt a bit but after you take it off you will see that all your blackheads should have come off with the mask. Wash your face with warm water and moisturize.

You need a lot of patience with this mask. Your tissue may rip or some steps might get you frustrated, but you will get the hang of it and you will love the end results.

Monday, May 13, 2013

Mani-Monday: Pastel Spring

I love the look of each nail having a different design on it. This style has become quite popular. I put together some Spring colors and created this nail look. It took some time to create but the end result was all worth it.
 
You will need:
Base coat
White nail polish
Mint green nail polish
Light pink/coral nail polish
Light purple nail polish
Silver striping tape
Top coat
 
Step 1: First, apply your base coat. Then apply 1-2 coats of your white polish. I used ‘White Hot’ by Sephora by OPI.
 
Step 2: Next, using your mint green nail polish, I used ‘Mint Mist’ by Maybelline, light pink/coral nail polish, I used ‘Van D’Go’ by Essie, and light purple polish, I used ‘Lilacism’ by Essie, paint on a section of each color on each of your nails. Let your nails dry completely.
 
Step 3: Then, using your striping tape in silver, apply it on the areas where each color meets.
 
Step 4: Lastly, apply a top coat and VOILA, a fun springy nail look.

Monday, April 29, 2013

Mani-Monday: Mint Sparkle

I have wanted a mint green nail polish for a while now! And finally ‘Mint Mist’ by Maybelline joined the other nail polishes. I am so satisfied with these Maybelline nail polishes that I want to get every one of them. ‘Mint Mist’ is supposed to be a mint green color however it turned out more bluish than green. But I still LOVE this polish. I wanted to create something simple yet different with this color because I just love the nail polish color so much that I wanted it to be the main focus. So I came up with this:

 
You will need:
Base coat
Mint green nail polish
Silver nail polish
Top coat
Step 1: First, apply your base coat. Then apply two coats of your mint green polish. I used ‘Mint Mist’ by Maybelline. You don’t really have to but I let it dry for about 2 minutes.
Step 2: Next, using your silver nail polish, I used ‘Electric Avenue’ by Nails Inc., start lightly applying the polish in upward strokes at the cuticle and stopping about half way. Try to create a fading effect. Apply the silver polish over again but this time just at the base of the cuticle.
Step 3: Lastly, apply a top coat and you’re done! It is classy and lets the mint green be the focus of the nail. It was quick and simple to create.

Friday, April 26, 2013

Kitchen Beautician: Moisturized Skin

 
Do you have dry skin? Well, I have a homemade face mask that will help you. It’s spring time with summer soon approaching (FINALLY!) and you want your skin to be glowy and smooth…not dry. So with just a few ingredients that you have at home we can fix this problem and get the gorgeous skin right in time. The only downside to this facemask is that it may be somewhat time consuming, but it is definitely worth a try. And who doesn’t love pampering themselves. 
 
You will need:
1 tsp. honey
One egg yolk
1 tsp. olive oil
1 tsp. lemon juice 
 
Instructions:
 
In a bowl combine the honey, egg yolk, olive oil, and lemon juice. Thoroughly mix together all of the ingredients. You are going to apply this mask in three steps, so do not apply the entire mask at once. First, apply the mask (you can use your fingers or a cotton ball) onto your face and let it dry. Do NOT wash the mask off! Then, apply the mask on a second time over what you already have on your face. Let it dry. When it is dry (once again do NOT wash it off), finally apply the mask on for a third time and wait with it on for about 20-25 minutes. Give yourself an at home manicure or read a magazine. After the time is up, rinse the mask off with warm water. Do this mask once a week for best results.
 
NOTE: this mask is suitable for dry and combination skin.

Monday, April 22, 2013

Mani-Monday : Wild Leopard


I have seen nude and neon nails around lately and I am loving them! I love the simplicity of the nude polish and then the pop of color of the neon polish. So I decided to create some fun and wild leopard nails using a nude polish as a base and a neon pink as the leopard print.
What you will need:
Base coat
Nude polish
Neon polish (any color)
Black acrylic paint
Dotting tool or toothpick
Top coat
Step 1: First, apply your base coat. Then apply two coats of your nude polish. I used ‘Sandstorm’ by Maybelline. Let it dry for about 5 minutes.
Step 2: Next, using your neon nail polish, I used ‘Venom’ by Duri, dot a few randomly on each nail. You can use the tip of the nail polish brush or a dotting tool.
Step 3: Then, using a toothpick, dip it in the black acrylic and outline the neon dots to create a leopard look. Lastly, apply a top coat and that’s it! It is subtle yet has a pop of color. Now show off those fun and wild leopard nails.

Wednesday, March 27, 2013

Brown Smokey Eye


This has been my go-to makeup look for a while now. It’s quick, easy, and really makes your eyes pop. Just simply sweep a brown shadow across your lid and blend through your crease. Then line your eyes with black gel eyeliner and smudge it out. Next, line your waterline with black liner. Coat your lashes with mascara and THAT’S IT! It is really that quick and simple. And the best part is that it looked like you put a lot of time and effort into creating a sultry smokey eye look. To see a step-by-step tutorial on how to achieve this smokey look, click here.

Monday, March 25, 2013

Mani-Monday: Chanel Quilted Nails


I have seen quilted nails everywhere recently. I love the look and classiness of them, so I decided to give them a try. They seem like they would be difficult to recreate, but with a little bit of practice they get easier. To get this nail look:
 
You will need:
Regular nail polish
Matte top coat
Card (credit card or any sturdy card will do)
 
Step 1: Paint you base color. Then apply the matte top coat and wait for it to dry for about 5-10 minutes. Make sure the polish doesn’t dry completely or else the lines will not show up. Also, make sure not to try to create the lines right after you apply the polish because it will lift the nail polish.
 
Step 2: After you have waited several minutes for it to dry, use the card to make the lines. Press down carefully to create diagonal lines.
 
Step 3: Using a toothpick or dotting tool, dip it into gold polish and dot it on the nail where each line intersects. You may also use glitter. Then, again, using the toothpick or dotting tool dipped in gold nail polish, draw on the Chanel logo. And you are done and have very fashionable Chanel quilted nails.

Monday, March 18, 2013

Mani-Monday: Marbled and Sparkled

 
Once again it’s time for Mani-Monday. I loved my nails this time around. I used the plastic wrap technique. Click here for the tutorial on how to achieve this look. I first applied a white polish as a base and then I used three different colors on each nail with the plastic wrap. I used a pink, blue, and purple polish. I like the interesting and marble effect it created. Then, on my ring finger I applied a white polish and let it dry completely and then applied KISS Classic Nail Dress in ‘Peignoir’. This nail design was quick and simple. And I LOVED IT!

Monday, March 11, 2013

Makeup Monday: Emerald Eyes

 
According to Sephora, the color of the year is emerald. Check out their color of the year collection. After seeing the collection and gorgeous colors, I was inspired to try out a look using emerald colors. I absolutely love this color; therefore, I was so excited to create a look with it. This look is also great for St. Patrick’s Day which is just around the corner!
1.  Apply the emerald eye shadow color (88 Ultra Shimmer Eye Shadow Palette by Coastal Scents) to your lid.
2.  Blend ‘Tease’ (Naked Palette 2) along the crease of your eye and along your lower lash line. Also, sweep #1 lightly along your lower lash line. Apply ‘Foxy’ (Naked Palette 2) to your brow bone.
3.  Using a black gel eyeliner (I use Clinique brush-oncream liner) line your upper lash line and blend it out using a blending brush (I use a MAC 217 blending brush).
4.  Apply black eyeliner or the same gel liner you used for your lash line in your waterline. Using Illamasqua ‘Breathe’, highlight your tear duct or inner corner of your eye.
5.  Curl your lashes and apply mascara.
NOTE: You can substitute the products I used, such as eye shadows and brushes, for different ones.

Friday, March 8, 2013

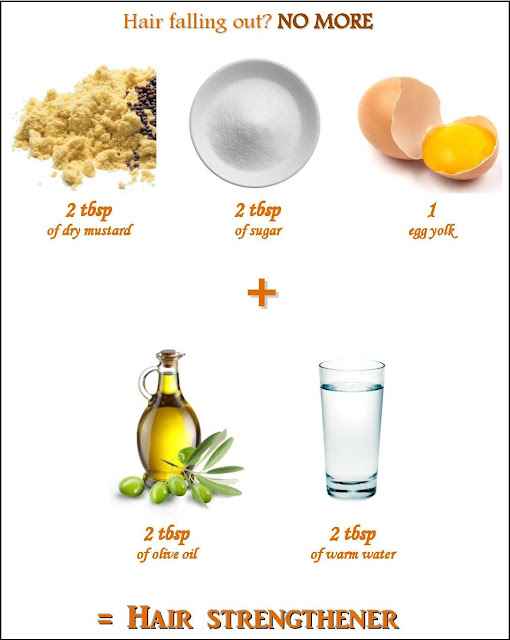
Kitchen Beautician: Hair Strengthener


It’s the weekend and once again it is time to pamper yourself! When you brush your hair, do you seem to lose a lot of hair? Well if you do, I have the perfect hair strengthening mask for you. My grandmother has tried this treatment and loves it. She has been a hair stylist for over 40 years, so when it comes to homemade hair treatments, I trust her opinion. Now let’s strengthen that beautiful hair so none of it falls out.
 
You will need:
2 tbsp. dry mustard
2 tbsp. sugar
One egg yolk
2 tbsp. olive oil
2 tbsp. warm water
 
Instructions:
 
In a bowl combine the mustard, sugar, egg yolk, olive oil, and warm water. Thoroughly mix together all of the ingredients. Then, apply the mixture to the roots of your hair. Put on a shower cap and wrap in a towel. Leave the hair mask on for about 30 minutes. After the time is up, shampoo and condition. Do this hair mask every two weeks or so to get the best results.
 
NOTE: If you feel a bit of a burning sensation the first time you try this hair strengthening mask, reduce the amount of sugar you use the next time you do it.
Follow my blog with Bloglovin

Monday, March 4, 2013

Mani-Monday: DIY Manicure


You are at a nail salon and get your nails done and spend about $20, more or less. WHAT! That is not okay. And that is about $20 or so every week or two. That definitely adds up. Sometimes we don’t have the money for that or we just do not feel like spending that much money. You can save up from those salon visits giving yourself a manicure at home and get yourself that pair of shoes you have been dying to get. I have been doing this every week and I love it. Ever since I started doing a salon manicure on my own at home, my nails have gotten stronger, my nail polish doesn’t chip as quick, my cuticles have been refreshed and are as pretty as ever, and most importantly I have saved so much money! It is quick and easy and SO relaxing. Here are the steps for the DIY manicure:

Friday, March 1, 2013

Kitchen Beautician: Shiny Smooth Hair

FINALLY, it’s Friday and it’s the weekend. Maybe you have some free time and have nothing to do. So what is better than spending it pampering yourself? Nothing!
 
Do you feel like your hair is dull and not smooth? Well I have just the home remedy for you! My mom has tried this treatment and  LOVES it. She has been raving about it for so long now. So let’s get that dull hair shiny and smooth again with this honey and olive oil hair mask.
 
You will need:
 
½ cup of Honey 
½ cup of olive oil
 
Instructions:
 
Depending on your hair length, the amount of honey and olive oil you will need may vary. Therefore, adjust the amount for your hair length so the mixture covers all of your hair. For long hair, about ½ cup of honey and ½ cup of olive oil should be enough to cover your hair.
 
If you don’t have a lot of time to spare, do this hair mask while you are taking a shower. Mix honey and olive oil in a small bowl and while you are in the shower, saturate your hair with the mixture. Leave the mixture in for a few minutes while you shave and do all that good stuff. You can put on a shower cap, but that is optional. After a few minutes shampoo and condition and you are done. It is that simple. Anything that simple is perfect for me!
 
If you have some extra time and are in no rush then warm up the honey and mix in with the olive oil. Apply and saturate the honey and olive oil mixture into your hair. You can put on a shower cap if you wish. Leave the mask on for about an hour or longer. The longer it stays on your hair, the better the end result. After the time is up, shampoo and condition. Your hair should look flawless, shiny, and smooth. Now all you need is somewhere to go to show off your gorgeous hair.

Monday, February 25, 2013

Mani-Monday: Simply Classy


This technique has become one of my favorite and quick go-to nail art tricks. You can achieve this look with any color combination. It’s quick, simple, and classy. I used a gold and peach nail varnish to get a more elegant and glamorous look. All you need is two different colored nail polishes, a top coat, nail polish remover, and a plastic wrap. Here are the steps:

1.      Start by painting you base color. I used ‘Van d’Go’ by Essie on my pinky, pointer, and thumb. Then I painted Revlon ‘gold coin’ on my ring finger and middle finger.

2.      Next, take a small plastic wrap and crinkle it up. Use the side that has the best pattern. You will use this to create the gold stone pattern on the peach color.

3.      Paint some of your gold nail polish on the plastic.

4.      NOTE: Before you start, dab the plastic wrap on a piece of napkin/paper once or twice to remove the excess polish. Now dab the plastic on your nail (peach color). Then do the next nail and/or reapply more of your gold polish if needed. After you finish dabbing the gold onto the rest of your nails, clean up the edges with nail polish remover and a q-tip, nail stick, or paint brush.

5.      Add a top coat, I use Sephora by OPI 3-in-1 base, top, & strengthener, and VOILA you’re done with your simple and classy nails!

Share your recreations on Instagram, just #thatbeautysecret. Would love to see pictures if you try it out! Follow ThatBeautySecret on Instagram.