Friday, March 29, 2013

Day to Night: Jean and Lace

Spring is FINALLY here and it’s getting warmer during the days but is still chilly at night. So I put together an outfit that you can wear from day to night with just adding a few things. This day outfit is comfortable enough for any day occasion. By adding tights, heels, and a belt, I transformed the outfit from day to night and I am now ready to go out on the town.

Day


Top: Love Culture top, Forever 21 jean jacket
Bottom: Forever 21
Bag: Street vendor in NYC
Shoes: Ralph Lauren Polo
 Night
I added black opaque tights, a belt, and a pair of black suede heels, which completely transformed the look from day to night. 


Top: Love Culture top, Forever 21 jean jacket
Bottom: Forever 21 shorts, Express tights
Bag: Street vendor in NYC
Shoes: Bakers
Accessories: Forever 21 belt

Wednesday, March 27, 2013

Brown Smokey Eye


This has been my go-to makeup look for a while now. It’s quick, easy, and really makes your eyes pop. Just simply sweep a brown shadow across your lid and blend through your crease. Then line your eyes with black gel eyeliner and smudge it out. Next, line your waterline with black liner. Coat your lashes with mascara and THAT’S IT! It is really that quick and simple. And the best part is that it looked like you put a lot of time and effort into creating a sultry smokey eye look. To see a step-by-step tutorial on how to achieve this smokey look, click here.

Monday, March 25, 2013

Mani-Monday: Chanel Quilted Nails


I have seen quilted nails everywhere recently. I love the look and classiness of them, so I decided to give them a try. They seem like they would be difficult to recreate, but with a little bit of practice they get easier. To get this nail look:
 
You will need:
Regular nail polish
Matte top coat
Card (credit card or any sturdy card will do)
 
Step 1: Paint you base color. Then apply the matte top coat and wait for it to dry for about 5-10 minutes. Make sure the polish doesn’t dry completely or else the lines will not show up. Also, make sure not to try to create the lines right after you apply the polish because it will lift the nail polish.
 
Step 2: After you have waited several minutes for it to dry, use the card to make the lines. Press down carefully to create diagonal lines.
 
Step 3: Using a toothpick or dotting tool, dip it into gold polish and dot it on the nail where each line intersects. You may also use glitter. Then, again, using the toothpick or dotting tool dipped in gold nail polish, draw on the Chanel logo. And you are done and have very fashionable Chanel quilted nails.

Wednesday, March 20, 2013

It's all about the shoes!


How many times have you spent staring at your closet and you just have no idea what to wear. I definitely have. But THEN something comes to my mind. I have been dying to wear these new shoes I just got but I don’t know if the outfit I decide to wear will go with them. So what I do is choose an outfit from the bottom up. Meaning, I pick the shoes I want to wear and select items to put together an outfit based off the shoes. This way you get to wear those new shoes you have just been waiting to wear and you put together an outfit in quicker time than just staring at your closet.

Monday, March 18, 2013

Mani-Monday: Marbled and Sparkled

 
Once again it’s time for Mani-Monday. I loved my nails this time around. I used the plastic wrap technique. Click here for the tutorial on how to achieve this look. I first applied a white polish as a base and then I used three different colors on each nail with the plastic wrap. I used a pink, blue, and purple polish. I like the interesting and marble effect it created. Then, on my ring finger I applied a white polish and let it dry completely and then applied KISS Classic Nail Dress in ‘Peignoir’. This nail design was quick and simple. And I LOVED IT!

Wednesday, March 13, 2013

Bold Alternative

 
I love the look of a bold lip. It can completely transform your whole look. If you are wearing a simple t-shirt and jeans, a bold lip can make your look that more interesting. Although I love a bold lipstick and it is definitely in this season, I am slightly hesitant of wearing one myself. So if you are scared of wearing a dark lipstick, you are not alone. There are ways that you can still wear a colored lip but not have it be so bold. There are many bold alternatives that give you just a hint of color on your lips:


Monday, March 11, 2013

Makeup Monday: Emerald Eyes

 
According to Sephora, the color of the year is emerald. Check out their color of the year collection. After seeing the collection and gorgeous colors, I was inspired to try out a look using emerald colors. I absolutely love this color; therefore, I was so excited to create a look with it. This look is also great for St. Patrick’s Day which is just around the corner!
1.  Apply the emerald eye shadow color (88 Ultra Shimmer Eye Shadow Palette by Coastal Scents) to your lid.
2.  Blend ‘Tease’ (Naked Palette 2) along the crease of your eye and along your lower lash line. Also, sweep #1 lightly along your lower lash line. Apply ‘Foxy’ (Naked Palette 2) to your brow bone.
3.  Using a black gel eyeliner (I use Clinique brush-oncream liner) line your upper lash line and blend it out using a blending brush (I use a MAC 217 blending brush).
4.  Apply black eyeliner or the same gel liner you used for your lash line in your waterline. Using Illamasqua ‘Breathe’, highlight your tear duct or inner corner of your eye.
5.  Curl your lashes and apply mascara.
NOTE: You can substitute the products I used, such as eye shadows and brushes, for different ones.

Friday, March 8, 2013

Kitchen Beautician: Hair Strengthener


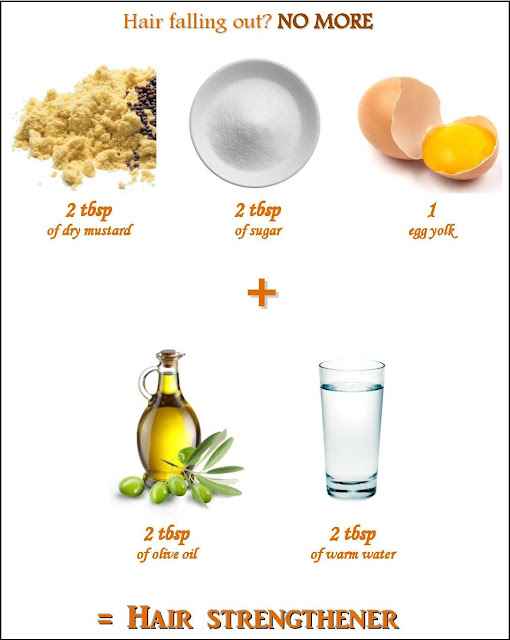
It’s the weekend and once again it is time to pamper yourself! When you brush your hair, do you seem to lose a lot of hair? Well if you do, I have the perfect hair strengthening mask for you. My grandmother has tried this treatment and loves it. She has been a hair stylist for over 40 years, so when it comes to homemade hair treatments, I trust her opinion. Now let’s strengthen that beautiful hair so none of it falls out.
 
You will need:
2 tbsp. dry mustard
2 tbsp. sugar
One egg yolk
2 tbsp. olive oil
2 tbsp. warm water
 
Instructions:
 
In a bowl combine the mustard, sugar, egg yolk, olive oil, and warm water. Thoroughly mix together all of the ingredients. Then, apply the mixture to the roots of your hair. Put on a shower cap and wrap in a towel. Leave the hair mask on for about 30 minutes. After the time is up, shampoo and condition. Do this hair mask every two weeks or so to get the best results.
 
NOTE: If you feel a bit of a burning sensation the first time you try this hair strengthening mask, reduce the amount of sugar you use the next time you do it.
Follow my blog with Bloglovin

Wednesday, March 6, 2013

GET THE LOOK: Black and White Luxe Tux


Luxe tux and black and white are two fashion trends this coming Spring 2013. The outfit Blake Lively is wearing is a mix of both of the trends, which is just great! I love the simplicity of the outfit yet it's classy and flattering. Get this look:
1.    H&M Natural White Blouse, $29.95
4.   Kenneth Cole Reaction Handbag, Vandam Street Oversized Frame Clutch, $33.99


Monday, March 4, 2013

Mani-Monday: DIY Manicure


You are at a nail salon and get your nails done and spend about $20, more or less. WHAT! That is not okay. And that is about $20 or so every week or two. That definitely adds up. Sometimes we don’t have the money for that or we just do not feel like spending that much money. You can save up from those salon visits giving yourself a manicure at home and get yourself that pair of shoes you have been dying to get. I have been doing this every week and I love it. Ever since I started doing a salon manicure on my own at home, my nails have gotten stronger, my nail polish doesn’t chip as quick, my cuticles have been refreshed and are as pretty as ever, and most importantly I have saved so much money! It is quick and easy and SO relaxing. Here are the steps for the DIY manicure:

Friday, March 1, 2013

Kitchen Beautician: Shiny Smooth Hair

FINALLY, it’s Friday and it’s the weekend. Maybe you have some free time and have nothing to do. So what is better than spending it pampering yourself? Nothing!
 
Do you feel like your hair is dull and not smooth? Well I have just the home remedy for you! My mom has tried this treatment and  LOVES it. She has been raving about it for so long now. So let’s get that dull hair shiny and smooth again with this honey and olive oil hair mask.
 
You will need:
 
½ cup of Honey 
½ cup of olive oil
 
Instructions:
 
Depending on your hair length, the amount of honey and olive oil you will need may vary. Therefore, adjust the amount for your hair length so the mixture covers all of your hair. For long hair, about ½ cup of honey and ½ cup of olive oil should be enough to cover your hair.
 
If you don’t have a lot of time to spare, do this hair mask while you are taking a shower. Mix honey and olive oil in a small bowl and while you are in the shower, saturate your hair with the mixture. Leave the mixture in for a few minutes while you shave and do all that good stuff. You can put on a shower cap, but that is optional. After a few minutes shampoo and condition and you are done. It is that simple. Anything that simple is perfect for me!
 
If you have some extra time and are in no rush then warm up the honey and mix in with the olive oil. Apply and saturate the honey and olive oil mixture into your hair. You can put on a shower cap if you wish. Leave the mask on for about an hour or longer. The longer it stays on your hair, the better the end result. After the time is up, shampoo and condition. Your hair should look flawless, shiny, and smooth. Now all you need is somewhere to go to show off your gorgeous hair.