Showing posts with label neon. Show all posts

Monday, September 9, 2013

Mani-Monday: Ombre Leopard

Sorry I have been MIA, I have a lot of things going on. However, this week’s nail look might be my favorite and I love the color combination. It is simple yet still something different. I think I will always love nude and neon together. The coral nail polish is such a gorgeous color. The picture does not do justice to how beautiful the color is. To get this look:
 

Monday, July 29, 2013

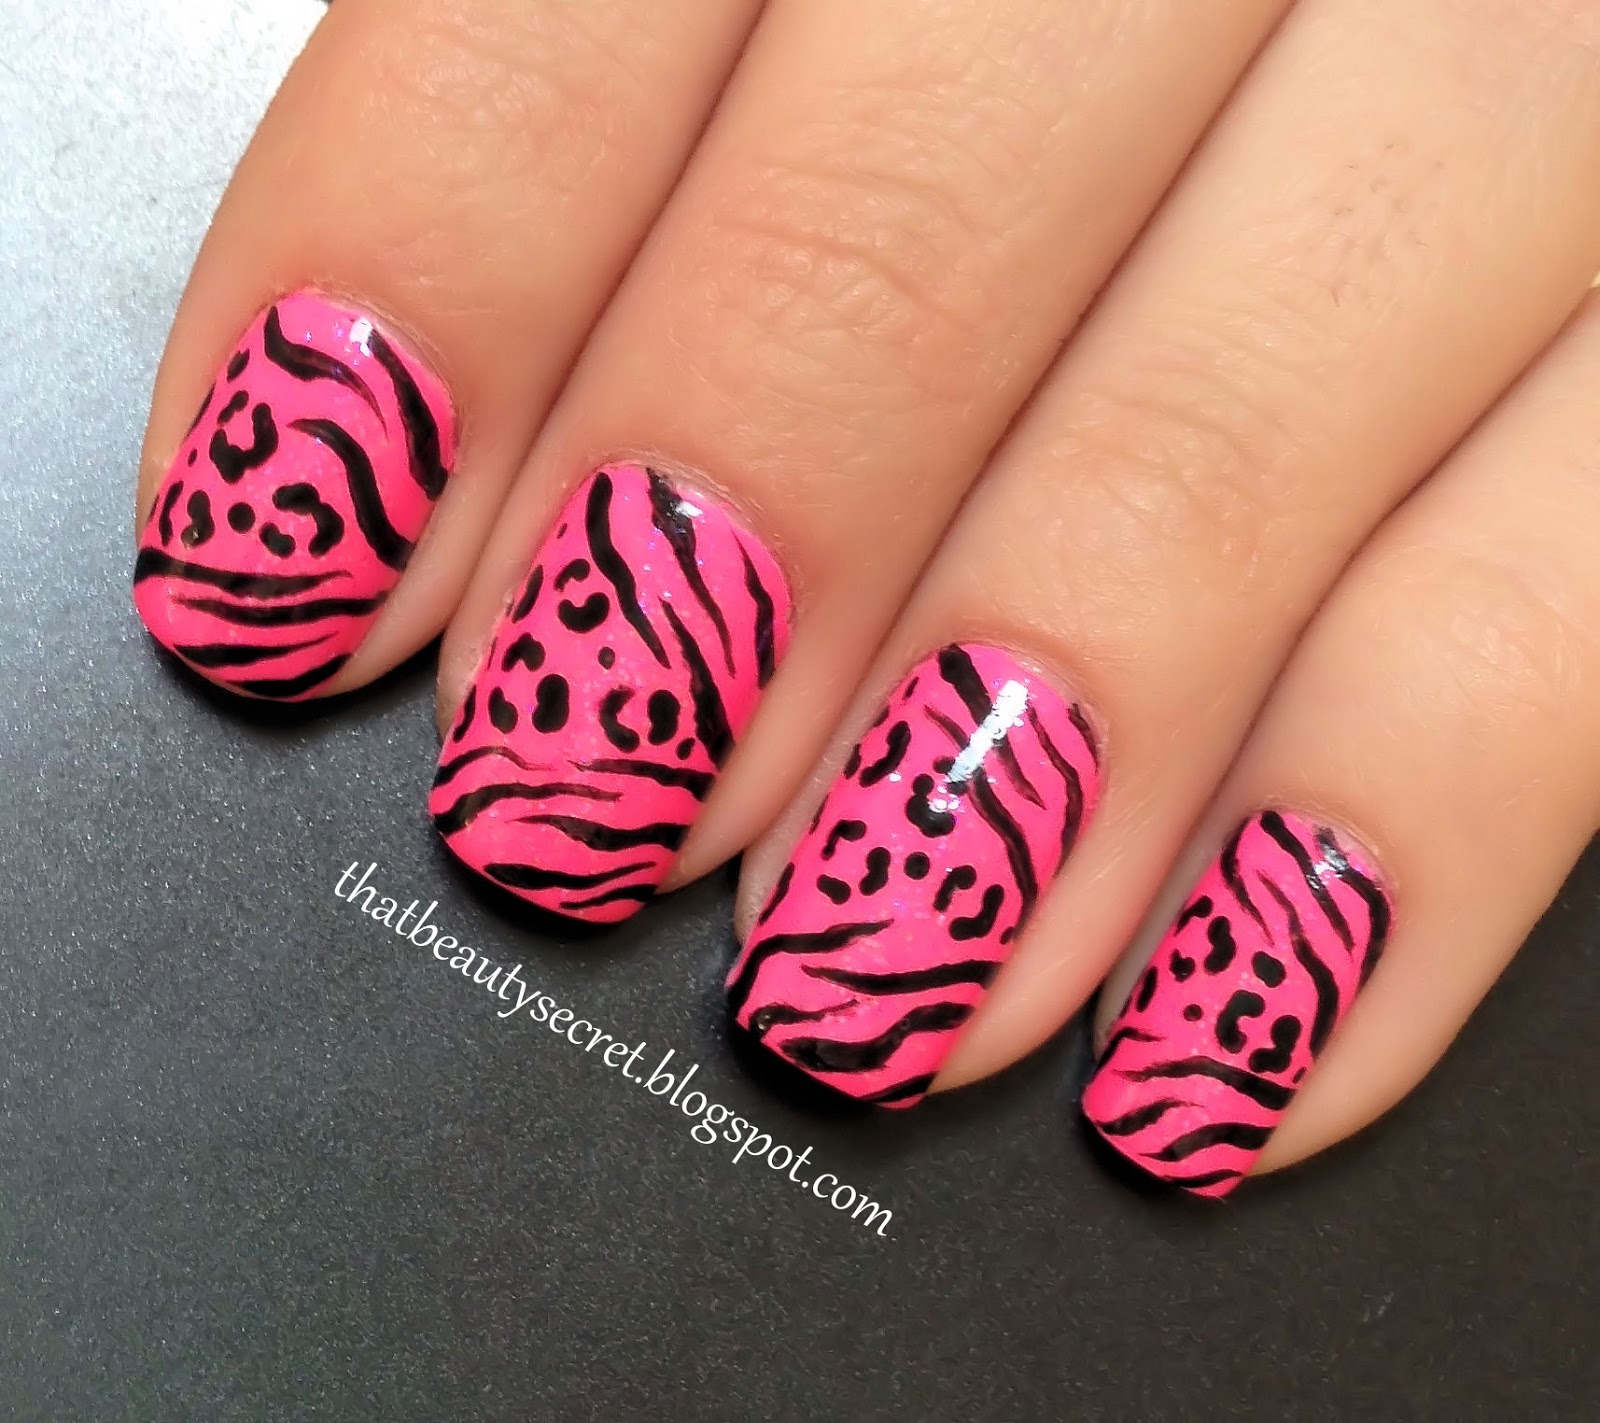
Mani-Monday: Wild Neon


It’s Monday again, which means it’s time for another nail look! This time our wild side is coming out with these nails…RAWR! Who doesn’t love zebra and leopard print nails, BUT what’s better than a nail look with BOTH zebra and leopard…NOTHING! With this fun and wild print and the bright neon nail polish, your nails are sure to be a stand out. To get this look:
 
You will need:
Base coat
Pink neon nail polish
Clear sparkle nail polish
Black acrylic or nail polish
Top coat
Striping brush or toothpick
Dotting tool
 
Step 1: First, apply your base coat. Then apply two coats of your pink neon polish. I used ‘24/7’ by Sinful Colors. Then apply your clear sparkle nail polish, I used ‘XL7’ by Inglot, which has a blue sparkle to give the nails an interesting look in the light. Wait for your nails to dry a few minutes.
 
Step 2: Next, using a striping brush or toothpick, dip it in the black acrylic or nail polish and create the zebra pattern. Create the zebra pattern in a diagonal on the top and half part of the nail (as seen in the picture above). Then, using your dotting tool or toothpick, dip it in the black acrylic or nail polish and create the leopard print in the empty space between the zebra print. Wait a few minutes for your nails to dry, so that the black will not spread when applying the top coat.
 
Step 3: Lastly, apply a generous amount of top coat and you’re done! Have fun with these wild nails and go show them off.

Monday, July 22, 2013

Mani-Monday: Stripes and Flowers


This week I created a simple nail look with a pop of color. It has a summery and girly feel. This nail design may take a while to create, but you are left with a great nail look. To get this look:
 
You will need:
Base coat
White nail polish
Black nail polish
Pink neon nail polish
Green neon nail polish
Top coat
Striping tape
Dotting tool or toothpick
 
Step 1: First, apply your base coat. Then apply two coats of your white polish, I used ‘Porcelain Party’ by Maybelline. Wait for your nails to completely dry. Waiting for your nails to dry is important because if your nails are still wet the tape will lift the nail polish).
 
 
Step 2: Apply a piece of striping tape vertically. Then leave a little bit of space and apply another piece of striping tape. Then leave a bit of space again and apply another piece of striping tape. Then leave a bit of space again and apply your last piece of striping tape. (LIKE THE PICTURE BELOW) 

 
Step 3: Using your black polish, I used ‘Onyx Rush’ by Maybelline, paint over the striping tape. Make sure to avoid applying the black polish outside the last two pieces of striping tape. Peel the striping tape off immediately (peel it off slowly). (LIKE THE PICTURE BELOW)
 
 
Step 4: Then, using your dotting tool or toothpick, dip it into your neon pink polish, I used ‘24/7’ by Sinful Colors, and dot five circles to create a flower. Then dip your dotting tool or toothpick into your green neon polish, I used ‘Summer Rain’ by Duri, and create a dot in the middle of the flower.
 
Step 5: Lastly, apply a generous amount of top coat and you are done!

Monday, July 8, 2013

Mani-Monday: Neon French

 
I love neon nail polishes, especially for the summer. This time I wanted to create something simple with bright colors. This nail design allows us to take a twist on the classic French manicure by adding color and lines. It’s fun and easy, but it does take a bit longer than other designs because of the drying time. To get this nail look:
 
You will need:
Base coat
White nail polish
Pink neon nail polish
Green neon nail polish
Top coat
Striping tape
 
Step 1: First, apply your base coat. Then apply two coats of your white polish, I used ‘White Hot’ by Sephora by OPI. Wait for your nails to completely dry. Waiting for your nails to dry is important because if your nails are still wet the tape will lift the nail polish).
Step 2: Apply striping tape on the very tip of your nail. Then leave a little bit of space and apply another piece of striping tape. Then leave a bit of space again and apply another piece of striping tape. (LIKE THE PICTURE BELOW)
 
 
Step 3: On the top space apply the green neon polish, I used ‘Summer Rain’ by Duri. Then on the bottom space apply the pink neon polish, I used ‘24/7’ by Sinful Colors. Peel the striping tape off immediately (peel it off slowly). (LIKE THE PICTURE BELOW)
 
 
Step 4: Then, Lastly, apply a top coat and you are done! Simple, fun, and colorful mani’s are just the best.

Monday, June 17, 2013

Mani-Monday: Green Stripes

The first time I saw this nail polish color I fell in LOVE! The color screams summer. I just needed to have it. I created this nail look with this green neon polish as the standout. Your nails are sure to be the center of attention with this new look. To get this look:
 
You will need:
Base coat
Black nail polish
Green nail polish
Top coat
Striping tape or scotch tape
 
Step 1: First, apply your base coat. Then apply two coats of your black polish. I used ‘Where’s the Soiree’ by Color Club. Wait for your nails to completely dry. 
 
Step 2: Next, using your striping tape or scotch tape, place it in the areas you want to stay black. Then using your green polish, I used ‘Summer Rain’ by Duri, apply two coats over the striping tape. Now do NOT wait for the nail polish to dry to take the tape off. Immediately but slowly take the tape off. (note: you can apply the tape on all your nails, but then apply the green polish and take the tape off one finger at a time, therefore not to let the polish dry).
 
Step 3: Lastly, apply a generous amount of top coat and you’re done! Show off this interesting new nail art.

Monday, April 22, 2013

Mani-Monday : Wild Leopard


I have seen nude and neon nails around lately and I am loving them! I love the simplicity of the nude polish and then the pop of color of the neon polish. So I decided to create some fun and wild leopard nails using a nude polish as a base and a neon pink as the leopard print.
What you will need:
Base coat
Nude polish
Neon polish (any color)
Black acrylic paint
Dotting tool or toothpick
Top coat
Step 1: First, apply your base coat. Then apply two coats of your nude polish. I used ‘Sandstorm’ by Maybelline. Let it dry for about 5 minutes.
Step 2: Next, using your neon nail polish, I used ‘Venom’ by Duri, dot a few randomly on each nail. You can use the tip of the nail polish brush or a dotting tool.
Step 3: Then, using a toothpick, dip it in the black acrylic and outline the neon dots to create a leopard look. Lastly, apply a top coat and that’s it! It is subtle yet has a pop of color. Now show off those fun and wild leopard nails.